
WCTV Features Guide
Getting to Know WCTV Gen 2
A new generation of the WCTV app has arrived, redesigned with fresh features and improved functionality to enhance your viewing experience. In this post, we’ll walk you through what’s new, how to navigate the updated app, and where to find all the key tools and settings. Please note: Favorites lists and recordings from the previous version will not carry over, so be sure to set those up again once you’ve downloaded the new app.
Need help downloading the new app – find instructions here.
WCTV – The Basics
Below will review how to use key features within the WCTV app. To get the most out of the WCTV app, you’ll want to use the Guide feature and the center OK button on your Roku remote is the key to it all.
When you’re in the Guide and want to bring up the menu for the show that’s currently playing, don’t just click OK—that will take you into the full-screen show. Instead, press and hold the OK button for about 3 seconds (this is called a long hold), then release. That long hold is what opens the menu so you can see more options without jumping into the show.
View Channel: This will take you to the full screen of the channel you had highlighted when you pressed the OK button.
Play: This is your replay button. When you select this it will play the show you had highlighted from the beginning. This option is available up to 24 hours back on the guide. You just arrow back to the show you want to replay and once selected hit the OK button and select the Play option.
Record: This will record the show you have selected on the guide. You can go out as far as the guide will let you on each channel to record. Just make sure you have the show you are trying to record highlighted on the guide
- Record Series: If you want to record the series make sure the ‘Record Series’ checkbox is selected
- Keep at least: Here will determine how many episodes of this series it will save if you reach your max number of hours to record
- Record episodes: Here you will select either new only or new and reruns. If you only want the newest episodes recorded, set it to ‘New only’ if you want all episodes to record (including reruns), select ‘New and reruns’
- Record This Episode Only: To record a singular episode only make sure there is no checkmark in the ‘Record Series’ box
***Note recordings will only stay stored for 7 days, and you can have up to 112 hours of recordings saved***
Favorites: This option will either say ‘Add to Favorites’ or ‘Remove from Favorites’. You do have to have a Favorite’s list set up for this. Instructions on how to do this will follow.
- Add to Favorites: Select the Favorites list name you’d like to add this channel to (Please note you must have your favorite lists made).
- Remove from Favorites: This will only show if it’s already saved in one of your favorites lists and you are currently viewing that list. If you no longer want it saved just remove it from the list you’d no longer like it on.
How Favorites Work
Favorites help you quickly access the channels and shows you love most. With the Gen 2 version of the WCTV app, you can now create multiple favorites lists, allowing you to organize your channels any way you’d like such as by genre (news, sports, entertainment), household preferences, or personal favorites.
Creating a Favorites List
- From the Home Screen, navigate to Settings.
- Select Favorites.
- Choose Create Favorite List.
- You’ll be prompted to name your list – enter any name that helps you identify it.
- Next, select the channels you’d like to add:
- Highlight a channel and press the center OK button on your remote. A hearticon will appear next to the channel.
- To remove a channel, highlight it again and press the center OK button to unselect it
- When you’re finished, scroll down and select the OK button at the bottom of the screen to save your list.
Don’t worry – you can always add or remove channels later.
Viewings and Using Favorites Lists
There are two ways to view and switch between your favorites lists, depending on whether you’re in the Channels view or the Guide:
From the Channels List (Home Screen > Channels)
- Use the left and right arrow buttons on your Roku’s remote’s directional keypad to quickly switch between your available favorites lists.
- The list name will appear at the top of the screen as you scroll.
- Once you land on the list you want, the Channels view will automatically update only showing those channels.
From the Guide (Home Screen > Guide)
- While in the Guide, press and hold the arrow button directly to the left of the Home button on your Roku remote for about 3 seconds, then release.
- A row of your Favorites lists (plus All Channels) will appear at the top of the guide screen.
- Use the directional arrow keys to highlight the list you’d like to view.
- Press the OK button and you be able to scroll through your favorites list only.
- To return to viewing all available channels, simply repeat the steps and select All Channels – this list will always be available.
Note: What ever Favorites list you’re on when you exit the Guide or Channels screen will be the list that stays active. This means:
- When you return to the Guide or Channels, that list will still be selected.
- When scrolling through channels in full-screen mode, the Roku remote will only cycle through the channels from that last selected list.
Adding or Removing Channels from Favorites
You can manage your Favorites lists from either the Guide or the Channels list, but the process varies slightly depending on what you’re doing.
Adding a Channel to Favorites
You must be viewing the All Channels list (either in the Guide or the Channels sections)
- Highlight the channel you want to add.
- Long-press the center OK button on your Roku remote, then release.
- Select Add to Favorites.
- Choose the Favorites list you’d like to add the channel to.
Removing a Channel from Favorites
You must be on the specific Favorites list that the channel is currently saved in.
- Navigate to the list using the left/right arrows (in Channels) or the long-hold and release method (in the guide).
- Highlight the channel you want to remove.
- Long-press the center OK button, then release.
- Select Remove Favorite List.
- Highlight the list(s) you want to delete and press center OK button on the remote to check the box.
Note: You will not see the option to remove a channel unless you are on a Favorites list that the channel is part of.
Using Recordings Screen
The Recordings screen gives you full control over what you’ve recorded and what’s scheduled to record. Here’s how to make the most of it:
Storage Overview
At the top of the screen, you’ll see how many hours you’ve used out of your 112-hourrecording limit. This helps you manage space and decide if anything needs to be deleted.
Tabs in the Recordings Section
- My Series:
Shows which series you’ve set to record.- Highlight a series and press the OK button to bring up a menu.
- From this menu, you can Cancel Series or Modify Series (adjusting recording settings like number of episodes to keep or whether to record new episodes only vs. all episodes).
- Latest: Displays the 10 most recently recorded shows, making it easy to jump into your newest content.
- Expiring Soon: Lists up to 30 episodes that are nearing their expiration date and will be automatically deleted soon. Use this to prioritize what to watch next.
- Individual Series/Shows: Below the tabs, each show or series you’ve recorded will appear in its own section.
- Scroll through to find what you’d like to watch.
- Highlight an episode to see details like recording date, season and episode number, and a brief description.
Watching and Managing Recordings
When you highlight an episode and press OK, a menu will appear with the following options:
- Play – Start watching the selected episode.
- Deleted – Permanently removes that individual episode.
- Modify – Choose whether episode should be automatically deleted when space is need, or kept until you manually delete it.
- Cancel Series – Stops all future recordings for that series.
- Modify Series – Change how many episodes to keep and whether to record new episodes only or new and reruns.
Exploring Your On-Screen Menu
When you are watching a channel you can also get a menu to pop up by hitting the center OK button while the show is playing. Below will walk you through each of the options that pop up when you do so from left to right:

Number Keypad: Here you can input the channel you’d like to go to. Just type the number in and it will automatically take you to the channel after a few seconds. Otherwise press the arrow button at the bottom right of the keypad.
Record: This will pop up the menu for Recording. If you only want to record this one episode make sure there is no checkmark in the box next to ‘Record Series‘. To Record the series make sure there is a checkmark in the box then choose whether you’d like to record new episodes only or new and reruns.
Replay: This option will play the show from the beginning. So if you missed the beginning of a show or movie just press this and you can start the show/movie over.
Back to Previous Channel: This option will take you back to the channel you were previously on.
Guide (EPG): This option will take you straight to the guide where you can see what will be on for all channels.
Closed Captions (CC): This option will turn on and off closed captions. Turn this on to see on-screen text of what’s being said, along with important sounds like music or sound effects. Great for watching without volume or for extra clarity.
Stream Info (Advanced): This option shows technical details about your video stream- like download speed, segment size, bitrate, and more. It’s mostly used for troubleshooting or checking streaming performance.
Below these options, you’ll find several sections that can help you discover something new to watch. Here’s what each section offers:
- Whats On: Get suggestions based on what’s currently playing. If you select the block labeled More, you’ll see a full screen of everything currently airing. To exit, just press the Back button on your remote and select Full Screen.
- Trending Now: See which channels and shows are currently popular and might interest you.
- Last Watched: Quickly return to channels you recently viewed for easy access.
- Latest: View your most recent recordings so you can jump back into them right away.
Getting to Know your Home Screen
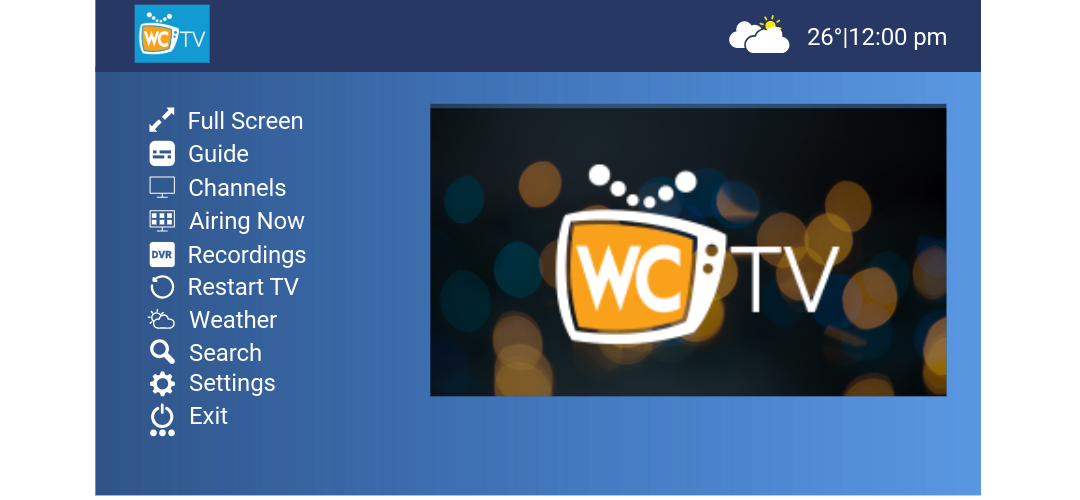
When you open the WCTV app, you’ll see the main menu on the left side of your screen. This menu gives you quick access to all the key features of the app, from browsing channels and checking what’s on now to managing your recordings and settings. Below is a brief overview of what each option does to help you navigate the app more easily.
Full Screen: Select this option to return to full-screen viewing of the channel you’re currently watching. It’s a quick way to exit the menu and get back to your program without interruption.
Guide: Opens the full channel guide where you can browse all available channels, see what’s currently airing, and check upcoming shows. You can also scroll back in time, up to 24 hours, to catch up on programs you may have missed, as long as they’re available to restart.
Channels: Lets you switch between your different favorites lists or view all available channels. Use the left and right arrows on your remote to toggle between lists. Selecting a list will filter the guide to show only those channels, making it easier to find what you want to watch.
Airing Now: Displays what’s currently playing across all channels, with shows grouped by genre, such as Lifestyle, Children’s, and Film. It’s a quick way to explore live content based on your interests.
Recordings: Gives you access to all your DVR content, where you can watch, delete, or manage your recorded shows and movies. This section also shows how much storage space you have left for future recordings.
Restart TV: This is your Replay TV section, allowing you to go channel by channel to watch shows that aired within the past 24 hours. It’s a convenient way to catch up on recent programming without needing to schedule a recording.
Weather: Displays your local weather forecast in more detail. The quick-view weather shown in the top right corner of the Home screen menu is based on Wittenberg, WI. For more in-depth weather information, select this option.
Search: Use this feature to look for specific shows or movies across the entire app. Youcan search through live TV, your recordings, and available Replay TV content, all in oneplace
Settings: Allows you to customize your WCTV app experience. Here, you’ll find options to manage Favorites, set up Autotunes, enable Parental Controls, view About information, and access Advanced settings for additional preferences and features.
Exit: Closes the WCTV app and returns you to the Roku home screen. Use this when you’re finished watching or want to open another Roku channel.
Getting to Know Your Settings Menu
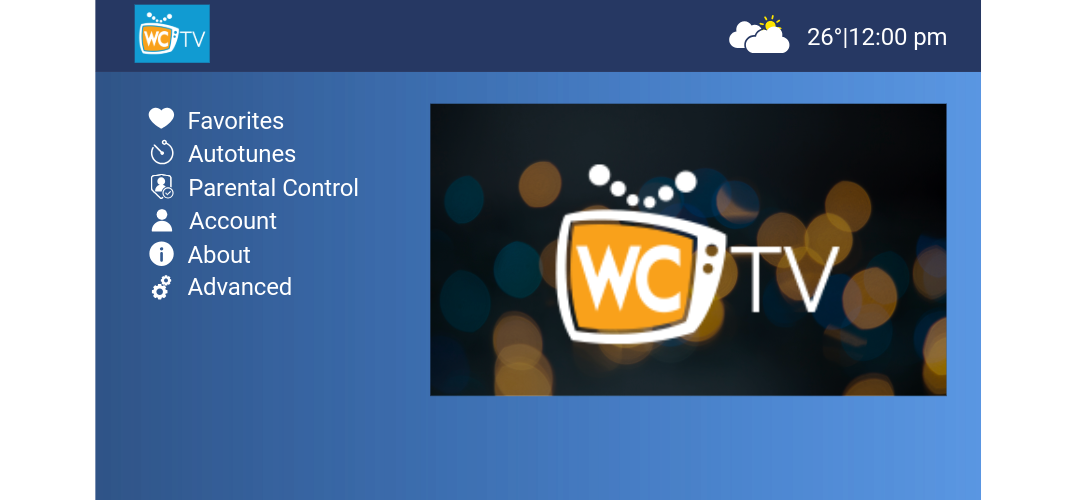
Within the Settings menu, you’ll find tools to personalize your viewing experience and manage how the WCTV app works on your device. Here’s a quick overview of what each option does:
Favorites: This is where you can create and remove your custom favorites lists. Use it to organize channels into groups that make browsing easier—like Sports, News, or Kids. Once a list is created, managing which channels appear on it happens in the Channels tab from the previous menu. To edit a list, switch to it under Channels, or add new channels from the All Channels view.
Autotunes: This is where you can view and manage all of your scheduled autotunes. Autotune is a feature that automatically changes your channel when a selected show begins—so you’ll never miss it, even if you’re watching something else. You can set up a one-time show or an entire series to autotune. From this menu, you can cancel or modify existing autotunes as needed.
Parental Control: Enable PIN protection to restrict access to channels or content based on ratings. This helps ensure that only age-appropriate programming is viewable, giving you more control over what’s accessible in your household.
About: Provides details about the WCTV app and your Roku device, such as app version, device ID, and other technical info. This information is helpful if we ever need to troubleshoot an issue or provide support.
Advanced: Contains tools you typically won’t need to use unless guided by support. Here, you can refresh your guide, which may be requested during trouble shooting to ensure your channel listings are up to date. You’ll also find the Unregister option, which removes this device from your account. Since you can have up to 5 devices registered, this is useful if you’re switching to a new device or freeing up a spot.
Questions?
Give us a call at (715)623-0558, we’ll walk you through it!